Today, we are talking about the clear wax.
The wax is soft with a consistency similar to crisco vegetable shortening. It is relatively odorless and goes on easily. You can put it on with a clean cloth or a waxing brush. If you are doing multiple projects, I would recommend purchasing the Annie Sloan waxing brush. The brush makes waxing easier and will improve your application process. If you are just doing a couple of pieces you don't have to have a fancy brush. They are a bit pricey but worth the investment if you are painting frequently.
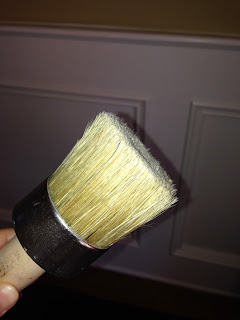
This is the waxing brush from Annie Sloan. As you can see, it is flat and round which allows for good coverage and helps you push the wax into cracks and crevices consistently and effortlessly.
How much wax do you use? You don't use a lot! Annie Sloan says in one of her videos, that "putting on wax is like putting on hand lotion". You want enough to cover your hands and be absorbed but you don't want your hands to feel greasy. It is the same concept with the wax.
Dip your brush straight into the wax can, or put some wax on a plate. Dip your brush into the wax and then brush off the excess wax so you have enough to cover the top bristles. You don't want big clumps of wax on your brush. Apply the wax in thin uniform strokes across the piece working with the woodgrain and in small sections. You can work in circular motions to get the wax into your piece but you should finish your last strokes going with the wood grain or paint strokes.
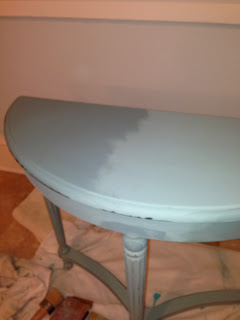
You can see where you have waxed because the color of your piece will intensify.
Once your piece is no longer tacky and feels dry to the touch (a couple of hours) you can buff the wax with a clean rag to a smooth shine.
It does take time for your piece to dry. If you continue to touch your piece right after you have waxed and buffed you are going to see finger smudges. Buff your piece and leave it alone for awhile. It takes about three weeks for the wax to actually cure to a hard surface. Try to limit handling during this time. Use mild soap and water to clean your piece and never use furniture polish or sprays containing harsh cleaning ingredients.
Paint, distress, wax and buff! I did add some dark wax after the clear wax on this piece. We will talk about dark wax and distressing in another post.
Thanks for reading!
Let me know if you have questions.
Paula
Linking with:
Upcycled Treasures


No comments:
Post a Comment